Seeing that everyone on Loc seemed to have a 5 TB OneDrive account, I also followed along and applied for an E5 subscription at https://developer.microsoft.com/zh-cn/office/dev-program. Next, I wanted to set up a OneDrive directory listing program. The programs currently available are:
- Olaindex
- Olaindex Multi-Drive Mod
- OneDriveUploader
- OneList
- OneIndex
- OneIndex Mod
- PyOne
- ZFile
- CuteOne
I posted a poll on Loc and saw that OneIndex was used by the most people. Unfortunately, it does not support mounting multiple IDs, so I ultimately chose the Olaindex modded version. Here is a detailed introduction to this modified version.
Author
Original project: https://github.com/WangNingkai/OLAINDEX
Modified project: https://github.com/YukiCoco/OLAINDEX-Magic
Modifications
Support for multiple OneDrive accounts:
- Multiple OneDrive cloud drives can be mounted simultaneously
- The image host can be configured to upload to different drives
- Multi-drive command support
Some minor fixes:
- Get download links with one click
- Copy image-host links
- Delete files via Ajax
- ......
Installation
First, prepare the Nginx + PHP environment and Composer. For Composer, you can read this article:
{cat_insidepost id="373"}
Note: Choose a PHP environment version above 7.1. Here, version 7.3 is used. Install the fileinfo extension, and also install the opcache extension to accelerate PHP execution.
Modify the PHP configuration and disable several disabled functions:
They are the following five functions: exec, putenv, shell_exec, proc_open, and proc_get_status.
At this point, the basic PHP environment is ready. Begin downloading Olaindex. The following commands are all executed in the website's root directory:
git clone https://github.com/YukiCoco/OLAINDEX-Magic.git tmp
mv tmp/.git . && rm -rf tmp && git reset --hard
cp database/database.sample.sqlite database/database.sqlite
composer install -vvv
chmod -R 777 storage && chmod -R 777 database && chown -R www:www *
php artisan od:install
# 此处绑定域名需根据实际域名谨慎填写(包含 http/https)

After installation is complete, do not forget to configure Nginx and point the domain to the /public directory under the application directory. Refer to the Nginx configuration below.
Multiple Accounts
Log in to Azure: https://portal.azure.com/ or https://portal.azure.cn/ (operated by 21Vianet)
Click Azure Active Directory, then click App registrations.
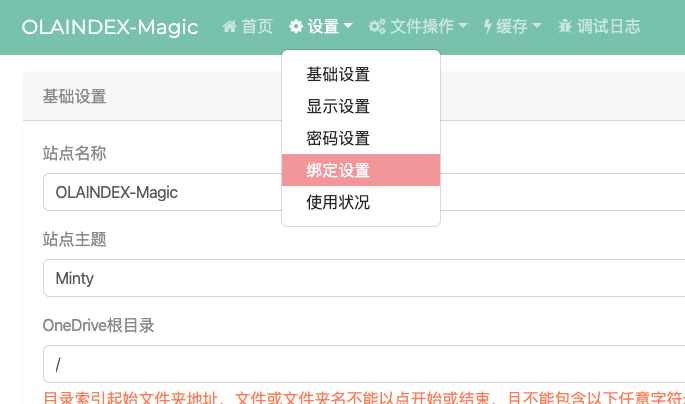
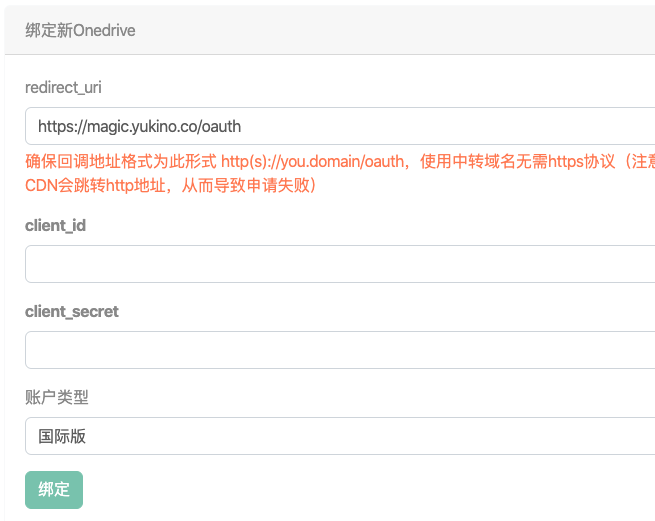
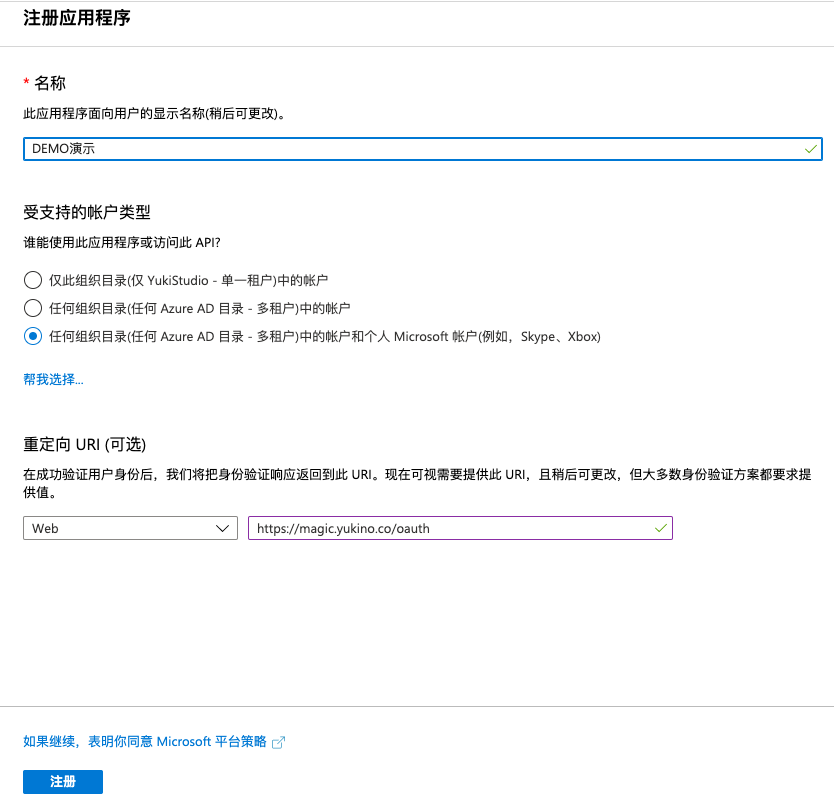
Click New registration, enter any name, select the account type as shown in the image, and enter the redirect_uri displayed on your page as the redirect URL.
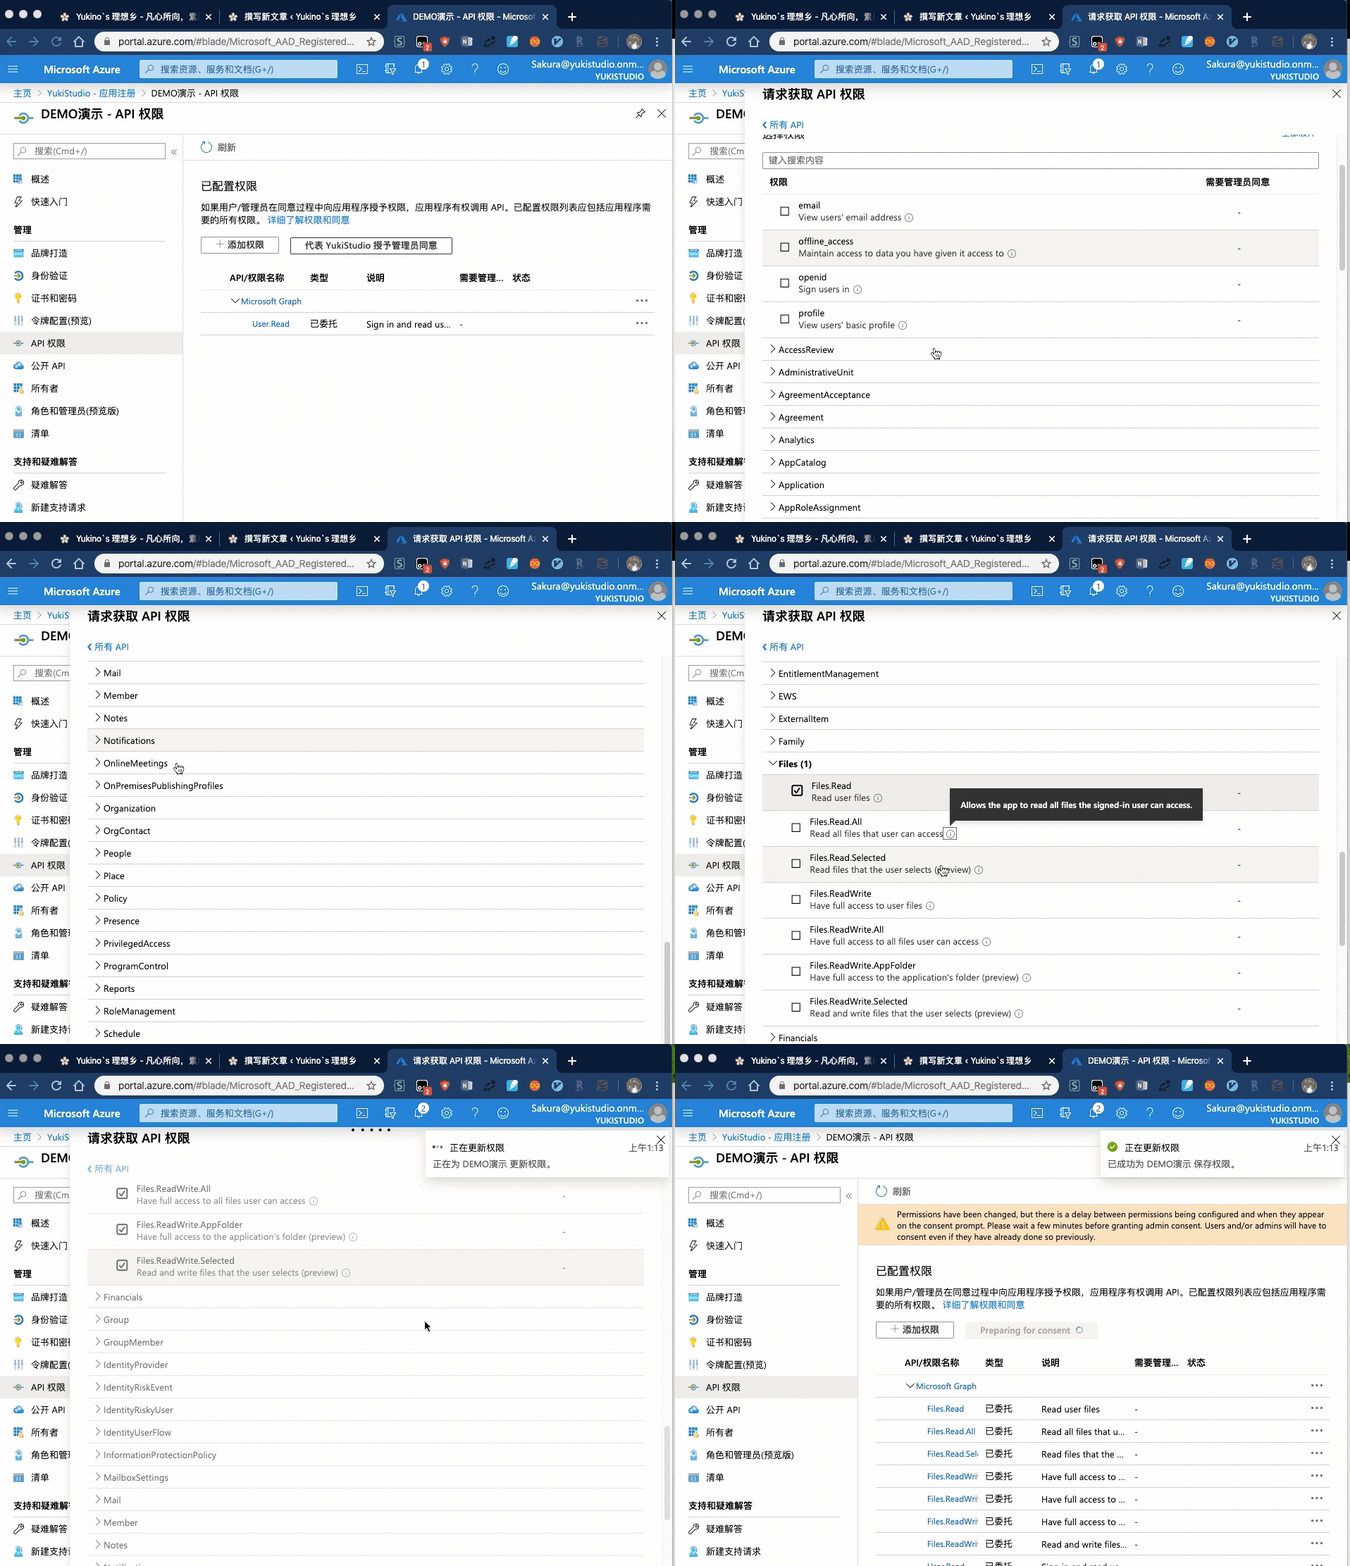
Next, configure the API permissions. See the GIF for the procedure:
Next, click Overview and copy the Application (client) ID (client_id).
Click Certificates & secrets, add a new client secret, and copy it (client_secret).
Enter client_id and client_secret on the binding page, select the appropriate account type, and the account can then be bound.
For binding multiple accounts, see: