Installing and Configuring the JDK 13 Environment on Windows 10
Tonight we held the class meeting for the new semester. In the video, I saw many familiar faces. We hadn’t seen each other for two months, and everyone had gained quite a bit of weight. After all, due to the impact of the pandemic, we had mostly stayed at home eating, drinking, and having fun, with less exercise. Teacher Xiaofei told us a lot about online livestream classes. Starting tomorrow, the school will organize training on how to use and study online courses, and formal online teaching according to the class schedule will officially begin the week after next.
The major courses for next semester will mainly be programming and web design. The content should roughly cover C language and HTML + CSS. Teacher Xiaofei also mentioned Java, so next I need to configure the environment required for Java development on my little laptop—that is, JDK.
Installation
Download JDK
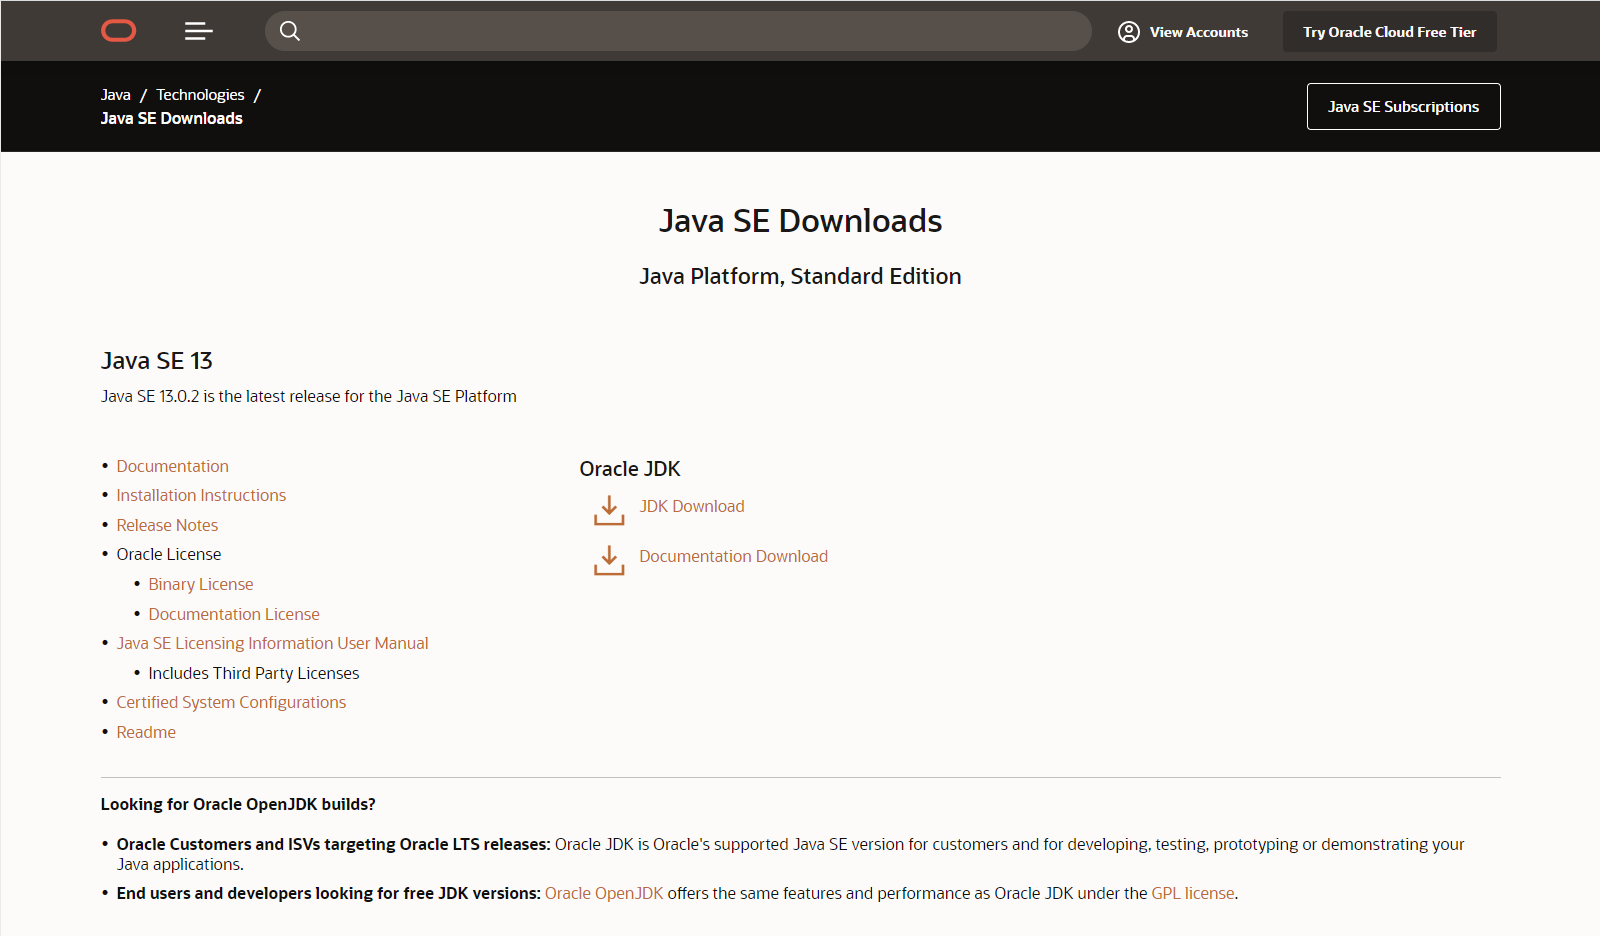
First, find the JDK download page on the Oracle website: https://www.oracle.com/java/technologies/javase-downloads.html.
You can see several JDK versions: Java SE 13, Java SE 11, and Java SE 8u241.
JDK 11, as an LTS version, is maintained for a long time and should currently be the one most commonly used by developers. Many Java tutorials online are also based on JDK 11 or JDK 8. However, I like to keep up with the times, so I chose JDK 13. If I encounter any problems later, I’ll tackle them one by one, right?
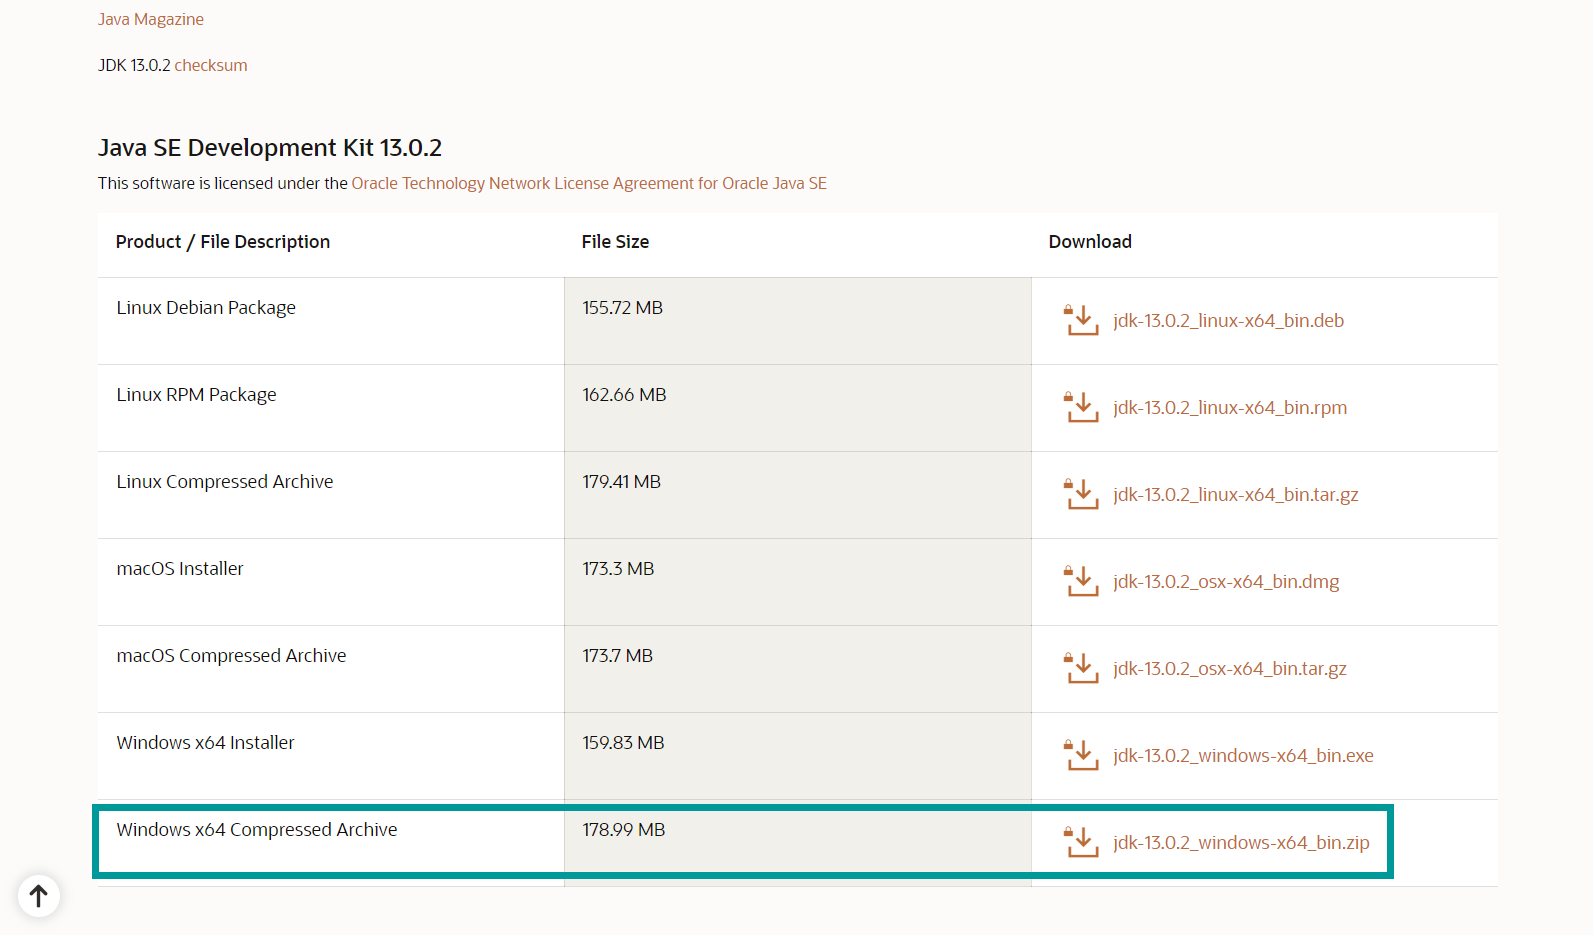
On the JDK download page, download the Windows x64 Compressed Archive version. Why not download the Windows x64 Installer? Because whenever a portable version of a program is available, I never use the installer, keeping the system simple.
Extract
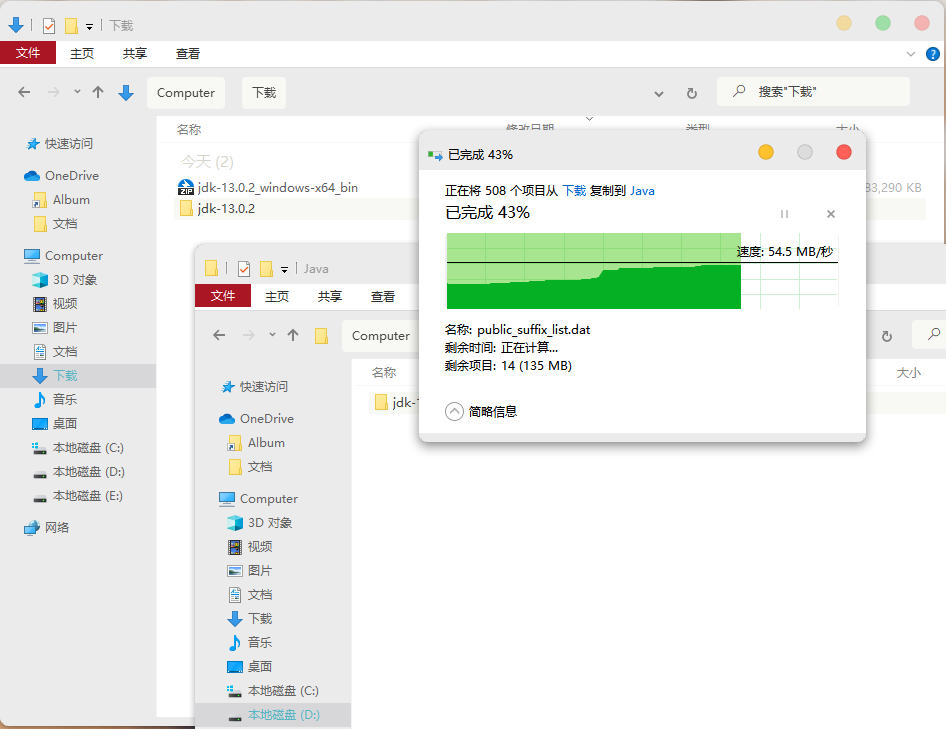
Extract the downloaded jdk-13.0.2_windows-x64_bin.zip, move it to the Java directory on the D drive, and retain the version number in the JDK directory name for easier management.
Generate JRE
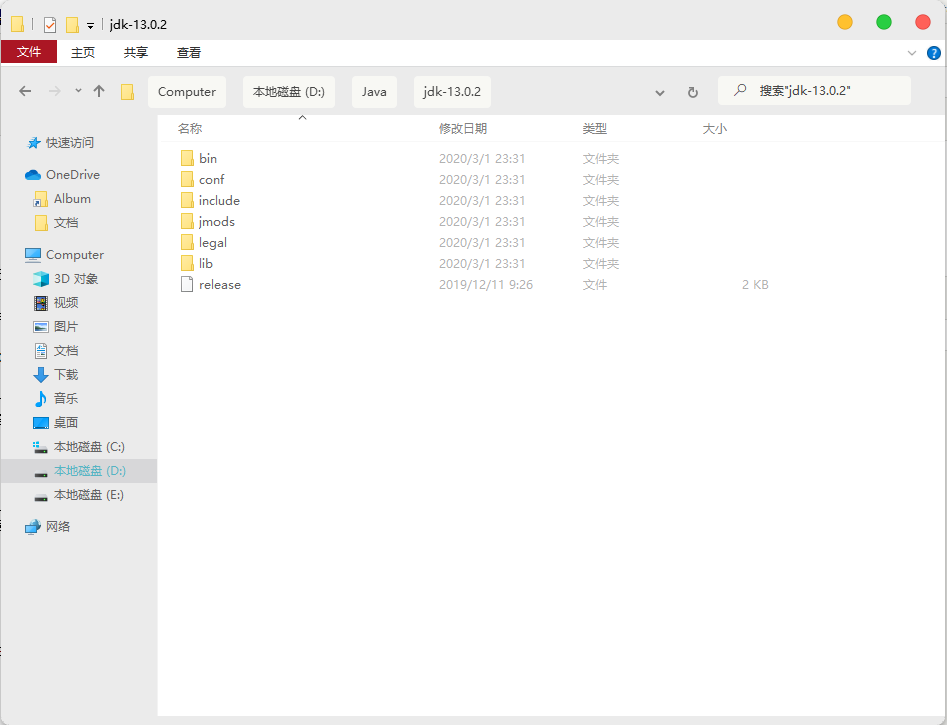
The currently installed Java version is jdk-13.0.2. As you can see, there is no jre folder (JDK versions after JDK 11 do not have a jre folder). You can generate one using the following command:
bin\jlink.exe --module-path jmods --add-modules java.desktop --output jre
Navigate to the JDK root directory in cmd and execute the command above to generate the jre folder.

If the jre directory appears, everything is fine.
Configuration
After installing JDK, you also need to configure the system environment variables. They are:
变量名:JAVA_HOME
变量值:D:\Java\jdk-13.0.2

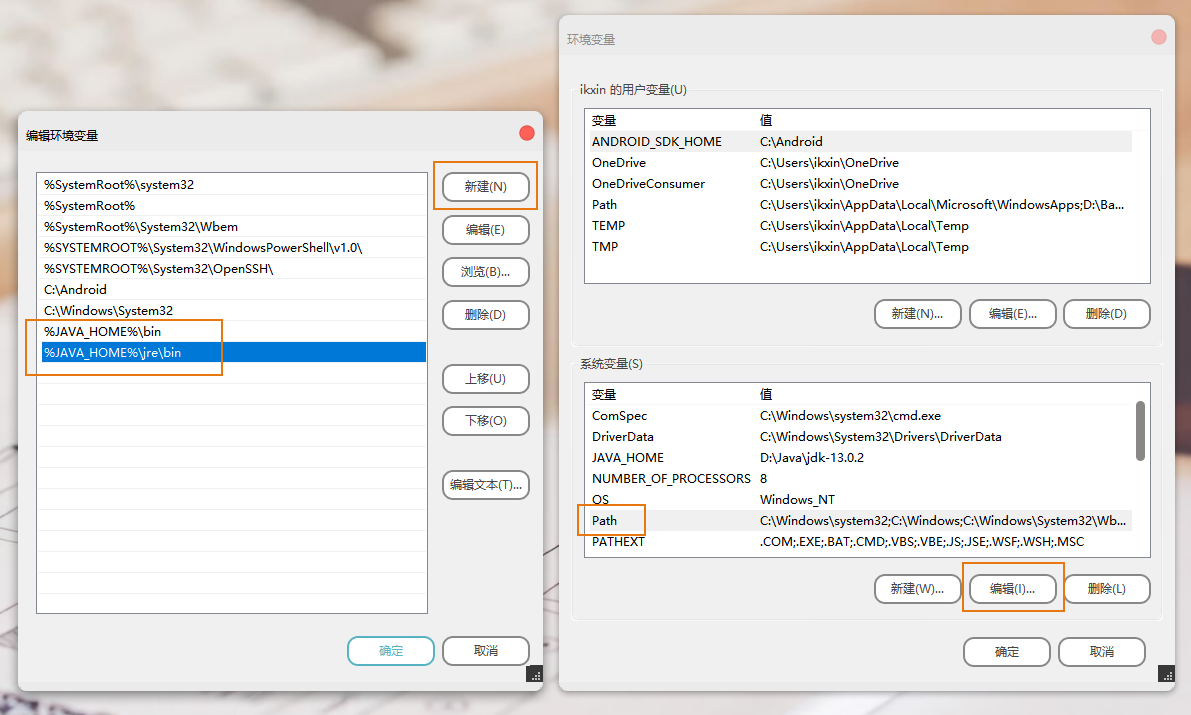
变量名:Path
变量值:%JAVA_HOME%\bin; %JAVA_HOME%\jre\bin
Right-click This PC to open System Properties, then select Advanced system settings -> Environment Variables in sequence to open the system environment variable settings interface. Next, add the three variables to the system variables.
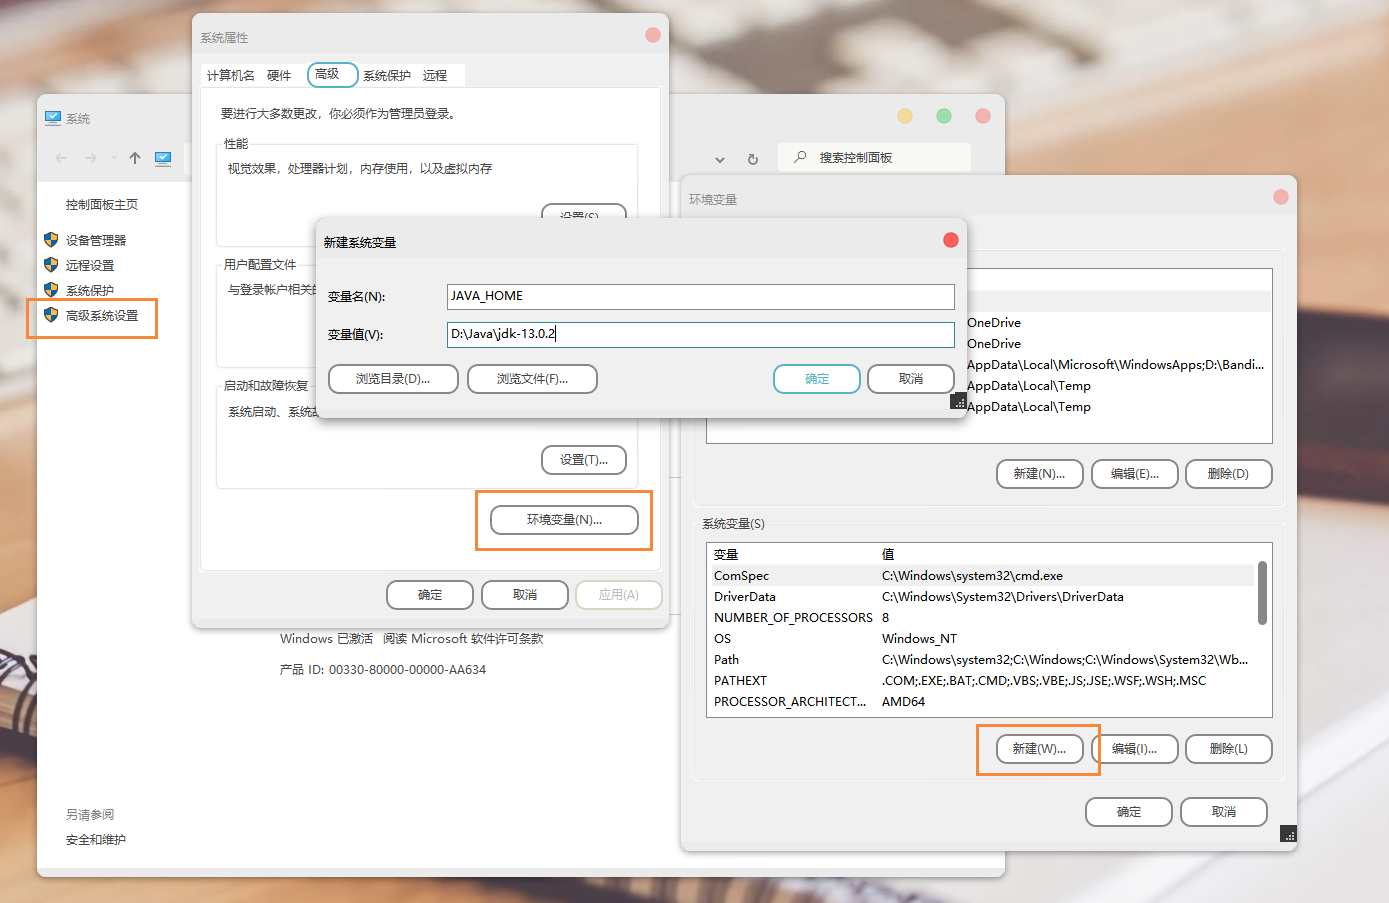
Be sure to create two new entries for Path.
Check
Open cmd and enter java -version and javac -version to check whether the JDK environment was installed successfully.
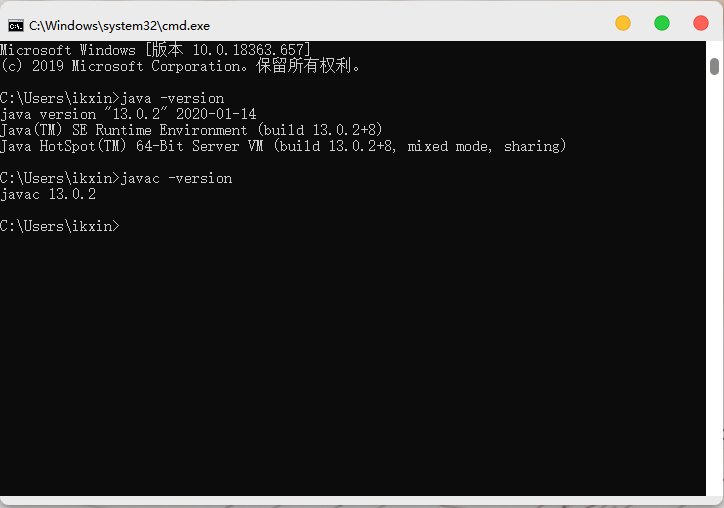
OK, no other problems. Tomorrow I’ll come back to write about how to install IDEA from JetBrains.
Comments
(10)像我这种老古董还在用着8做着开发
存在多个JDK,需要把想用的JDK环境变量放大最前面
存在多个JDK,需要把想用的JDK环境变量放到最前面
了解了OωO
老哥 我能求一下你的主题吗?挺喜欢的。(ฅ´ω`ฅ)
主题是handsome
有JAVASE14,一样的下载方法吗
应该是,我是16,照着这个方法成功了
安装成功啦,开心OωO
你的系统咋弄的